The Alocasia Frydek is among the most popular houseplants out there. You’ll be hard-pressed to find an avid plant enthusiast that doesn’t have it as part of their collection.
Although this plant is relatively easy to care for, you still need to know what you should do to keep it healthy and thriving.
This foliage plant requires moist, well-drained soil. It also grows best at temperatures between 65 and 80℉ and a humidity level of 70% or higher. Additionally, Alocasias thrive when exposed to bright, indirect sunlight for at least six hours daily.
Read on to learn more about caring for an Alocasia Frydek, as well as some amazing design ideas to boost your home’s aesthetic with this plant.
Characteristics of Alocasia Frydek
Here’s an overview of the Alocasia Frydek plant in terms of its aesthetic, growth habits, and the environment in which it thrives:
Physical Appearance
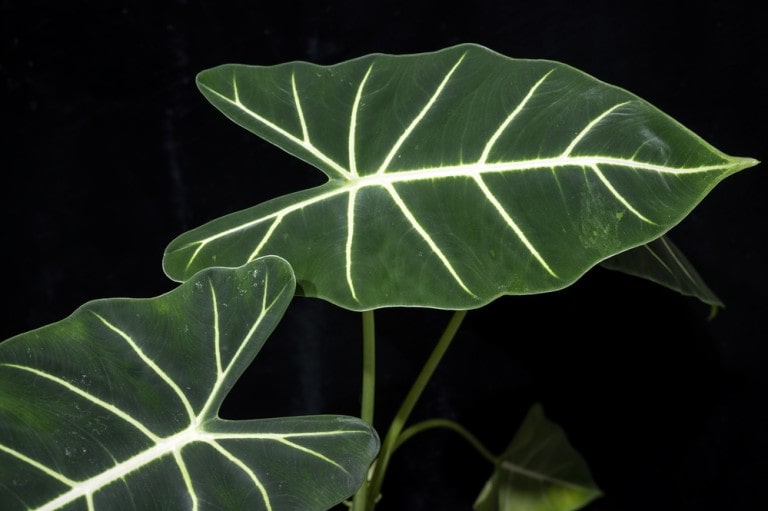
The Alocasia Frydek is a voluminous foliage plant known for its large, dark, velvet-green leaves. The white veining on its leaves provides a stark contrast that further beautifies this plant’s aesthetic.
Growth Habits
An Alocasia Frydek will grow between two and three feet tall and wide when it fully matures in the wild. However, it’s more likely to peak at two feet tall when grown as a houseplant.
This plant produces new leaves every few weeks. However, note that the new leaves don’t grow alongside the old ones. Instead, they replace the ones that fall off.
At any given time, the main rhizome of your Alocasia Frydek is likely to have four or five leaves.
Environmental Preferences
The Alocasia Frydek’s natural habitat lies in the tropical rainforests of Southeast Asia, in the Philippines to be exact.
Whether growing in the wild or your home, Alocasia Frydek plants tend to thrive in warm and humid conditions. They also prefer exposure to bright indirect sunlight. We’ll discuss the best growth conditions for these plants in more detail in the upcoming section.
How to Care For Alocasia Frydek
In the sections below, we’ll outline the conditions you’ll need to provide for your Alocasia Frydek plant for it to grow strong and healthy:
Soil Requirements
When growing an Alocasia Frydek, we recommend potting it in moist, rich, well-ventilated soil. This soil needs to be loose and have good drainage because overly compact soil makes these plants more prone to root rot, which we’ll discuss later in this guide.
Good soil for Alocasia Frydek can be composed of 60% peat, 30% perlite, and 10% compost.
Watering and Humidity
As for their water requirements, Alocasia Frydek plants are better off when watered based on need instead of a preset schedule.
The reason is that these plants require different amounts of water at different times of the year. Therefore, you should water your Alocasia Frydek when you feel the soil has dried out excessively.
A good indication that it’s time to water your Alocasia plant is noticing that the top two inches of the soil are dry.
In terms of humidity, Alocasia plants thrive at moderate to high levels. 70% humidity should do the trick. These conditions can be found in indoor locations, such as your kitchen or bathroom.
If you want to ensure you’re providing the correct humidity, we recommend investing in a humidifier.
Light and Temperature
Alocasia Frydek plants grow best in bright, indirect sunlight. You should expose your plant to this kind of sunlight for at least six hours a day. If these conditions aren’t met, your Alocasia will still survive. However, it won’t grow as effectively as it should.
As for their ideal temperature, Alocasia plants prefer the level of warmth they experience in their natural habitat. Their optimum temperature ranges between 65 and 80℉.
Common Problems and Pests Associated With Alocasia Frydek

Image source: Google
When growing Alocasia Frydek, there are some common issues that may arise. Here’s an overview of these problems and how to avoid them:
Overwatering and Root Rot
Root rot is an ailment that all plants are prone to. It can happen due to various reasons. In the case of Alocasias, the most common cause of root rot is overwatering. The reason is that most Alocasia owners make the mistake of excessively watering to keep the soil moist.
Other causes of root rot include insufficient sunlight, low temperatures, and poor soil drainage.
When the soil gets waterlogged, your Alocasia’s roots suffocate and don’t get the oxygen they need to work properly. In turn, they can’t serve their function of getting nutrients from the soil to your plant.
Pest Infestations
The Alocasia Frydek often falls victim to a range of pests. The pests most likely to affect your plant are spider mites. Other common Alocasia pests include aphids and insects.
An Alocasia plant infested with spider mites will have telltale signs. Since spider mites strip your plant of chlorophyll, they cause white spots to form on the leaves. If you don’t address this before it’s too late, the leaves will go yellow and eventually die.
Another common symptom of spider mite infestation is webbing on the plant’s leaves.
Regularly treating your plant with insecticidal soap or neem oil is an effective way to keep the pests at bay.
Environmental Stress
When an Alocasia plant isn’t provided with the right conditions for a prolonged time, it can get stressed. This can happen for a number of reasons, including lack of nutrition, or incorrect water, light, and temperature conditions.
A stressed-out Alocasia plant will usually express its distress through drooping leaves.
Therefore, you should always ensure that the temperature, light, soil, and humidity conditions your plant is in are ideal.
Propagation of Alocasia Frydek
There are several methods for Alocasia Frydek propagation. We’ve provided a brief description of each one below:
Division of Rhizomes
One way to propagate your Alocasia Frydek is through rhizome division. You should only put your plant through this process when it’s fully mature and healthy.
The best time to propagate an Alocasia plant is in early spring.
We recommend watering your plant the day before you plan on propagating it. Doing so reduces the risk of transplant shock and makes it easier to remove the plant from its pot.
You should remove the plant carefully and loosen any clumps of soil with your fingers to avoid damaging the roots.
Once you’ve pried the plant out, use a sterilized blade to cut a part of the rhizome. Place the part you cut into a new pot that’s not too big. Make sure that the soil in the new pot is moist and place it in a warm area that’s not under direct sunlight.
Propagation by Corms
If your Alocasia plant is mature, you can propagate it using its corms.
These are small, round chunks you can find around the plant’s roots. Use a knife to snip the corms away from the roots and try to keep as much of the root attached to the main plant as possible.
Next, root the corms by placing them in a small amount of water in such a way that they’re not fully submerged.
If you give the budding corms enough bright, indirect sunlight and keep the humidity suitable, you should notice little roots emerging from the corms in a week or two.
Seed Propagation
Another propagation method for Alocasias is seed propagation.
Place the seeds on the soil’s surface and then spray the top of the soil with a misting bottle. Doing so will keep the seeds’ environment moist but not overly so.
Wait until seedlings appear, keeping in mind that this can take a month and a half from the date of planting. Once they do, move the growth container to a spot that gets bright, indirect sunlight.
You can expect the first traces of your new Alocasia plant to show after a month or two. Exactly how long it takes depends on the temperature and humidity level the plant is in.
How to Repot Alocasia Frydek
Here are the best practices to follow when repotting an Alocasia Frydek plant:
Signs That It’s Time to Repot
The Alocasia Frydek plant does not need to be repotted often. Repotting these plants too frequently can harm them.
You should only report Alocasias in springtime, especially if you see overgrown roots poking out the bottom of the pot.
Other indicators that it’s time to report an Alocasia are stunted growth and noticing that the soil’s drainage has become subpar.
Choosing the Right Pot and Soil
When repotting an Alocasia Frydek, you should place it in a pot larger than the current one. Ideally, the new pot should be an inch larger.
As for the soil, it should be well-draining, well-ventilated, and moist. Using a mix with the composition of peat, perlite, and compost mentioned earlier should suffice.
Repotting Techniques
When repotting your Alocasia Frydek, you should water the plant well a day in advance. Doing so will reduce the chances of the plant experiencing transplant shock.
Additionally, make sure to add excess perlite to the new soil if you live in an area that doesn’t get much sunlight.
Design Ideas For Incorporating Alocasia Frydek in Landscaping
The Alocasia Frydek is a stunning plant in and of itself. However, that doesn’t mean that you can’t further take advantage of its aesthetic through clever design.
Here are some ideas to consider:
Container Gardening
If you have limited space to display your majestic Alocasia Frydek plants, container gardening is the way to go. You can install the containers on your balcony rail and let the plants’ beautiful foliage hand, creating a tropical aesthetic.
Mixed Planters and Terrariums
Another route to consider is mixed planters and glass terrariums. Growing your Alocasias in one of these is sure to add an exotic feel to your home’s ambiance.
Indoor Plant Displays
Indoor plant displays are your best option if you don’t have a garden or a balcony. They allow you to add green vibes to your home without taking up lots of space. You’ll feel like you’re hanging out in your private little rainforest.
Conclusion
Are you thinking of getting an Alocasia Frydek as your latest houseplant? If you are, we approve of that choice.
Follow the tips and guidelines we’ve discussed in this article to make sure that your plant grows strong and healthy and adds an exotic feel to your home’s aesthetic for years to come!